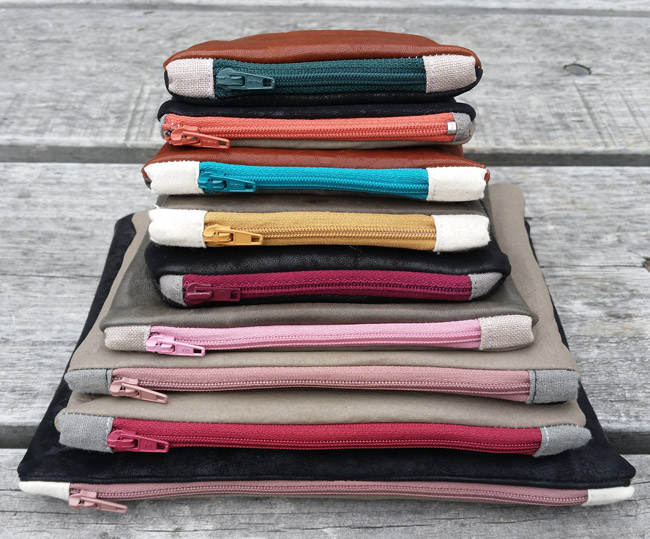
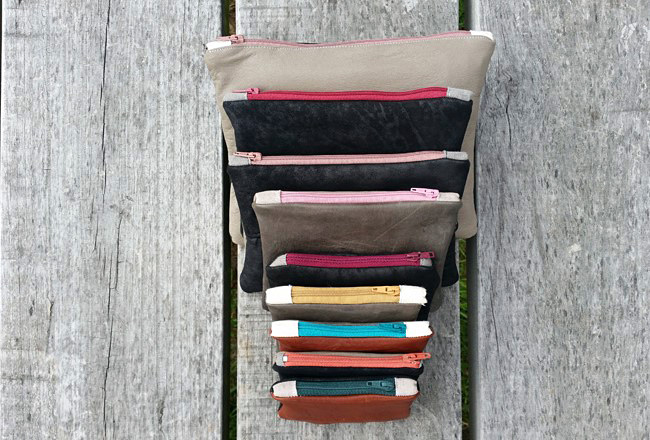
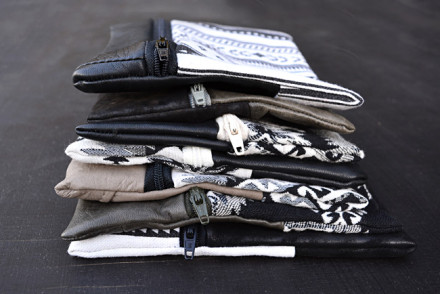
This two tone leather purse DIY project is a variation on the basic recycled leather zip purse I did a few months back. But this purse differs slightly with the addition of contrast fabric tabs at each of the zip. I think they work to give a much more polished and neater look. They also help the zip sit a lot flatter and the corners more square. For these reasons this is probably my favorite style of all the purse’s I have tried. Aided by the fact that I love these contrasting color combinations! Read on for detailed step by step instructions and images.

Here’s how I did it
What you’ll need:
- Old leather garments – jacket or a skirt
- Colorful zips
- Leather or denim sewing machine needle
- Contrast cotton
- Plain fabric (non stretch)
- Iron
Step 1| Buy some old leather garments
This is my favorite part….the hunt for the leather via all the second hand stores I can find! I love good thrift shop expedition and they are definitely the cheapest place to buy old leather garments. Look for beautiful soft leather skirts and jackets in both suede and smooth leather. Make sure the leather is not too thin as you want a little structure and strength but not too tough either as you need to be able to get your sewing machine through it without much trouble. I bought a selection of leather so I could play around and see what worked best and this way I had a good selection of colors for my two tone look.
Step 2| Cut out the purse
Cut out two pieces of leather in the size that you want, allow for a 1cm seam allowance and make sure they are exactly the same size. A rotary cutter is good for this but scissors are fine too. 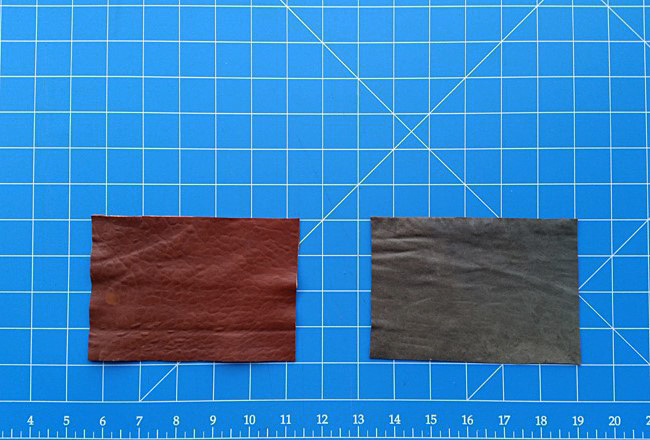
Step 3| Make the fabric tabs
Making the tabs is pretty simple, all you need to do is cut out a 4cm wide and 3cm high piece of your chosen fabric. Make sure it is non stretch. Then using an iron, press the piece of fabric in half. This gives a clear halfway line.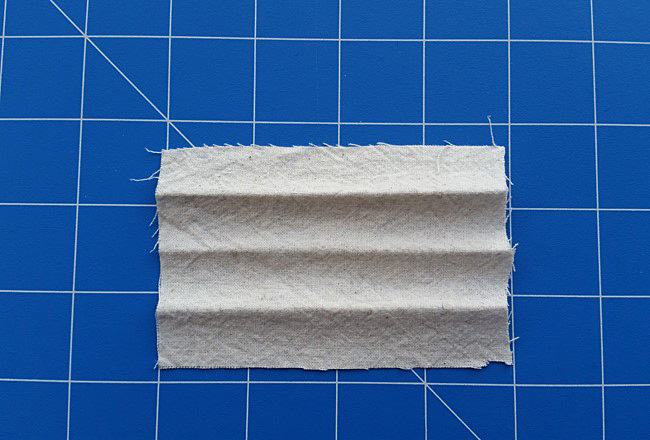 Now fold and press the fabric so it looks like this……
 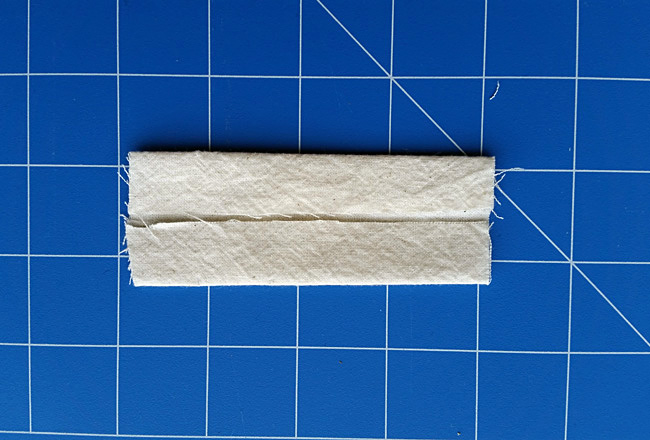 and fold and press it in half like this……..
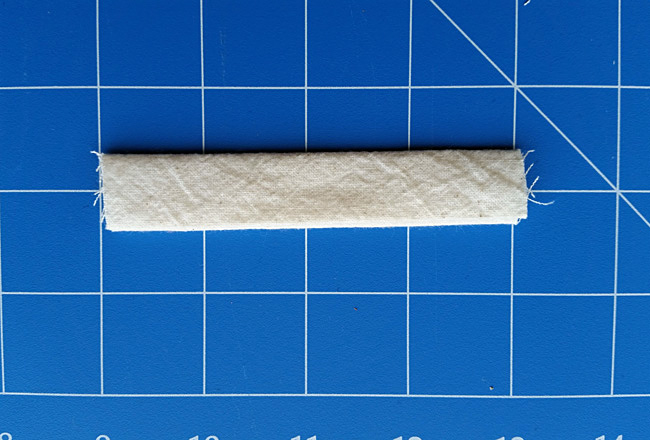
Step 4| Trim the zip up to the stopper
Trim the excess material “tail” off the zip at the top end. Just above the metal stoppers. 
Step 5| Attach the fabric zip tabs
Pin the fabric tab (stay to one side as you will use the other half for the second tab at the other end of the zip) to the end of the zip like this. Make sure the zip is sandwiched inside the folded over fabric.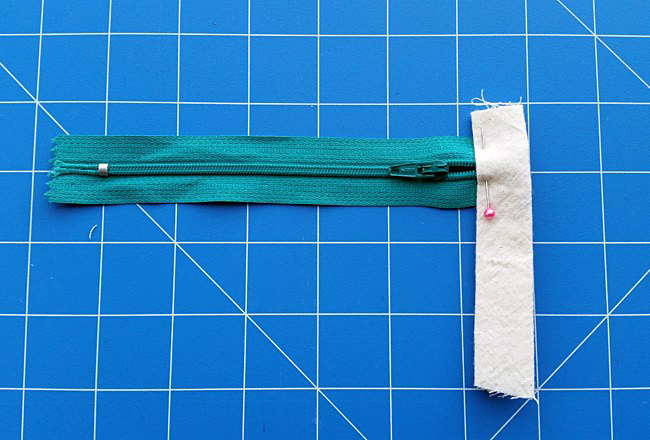 Now sew the fabric tab to the zip, staying as close to the edge as possible. Trim to the same width as the zip.
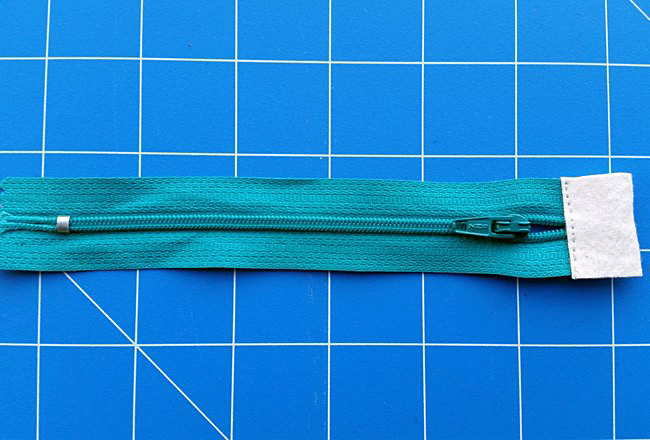
Step 6 | Trim zip to correct length
Now lay the zip on top of one of the leather pieces for a measuring guide and trim the zip allowing 1cm each side for seam allowance.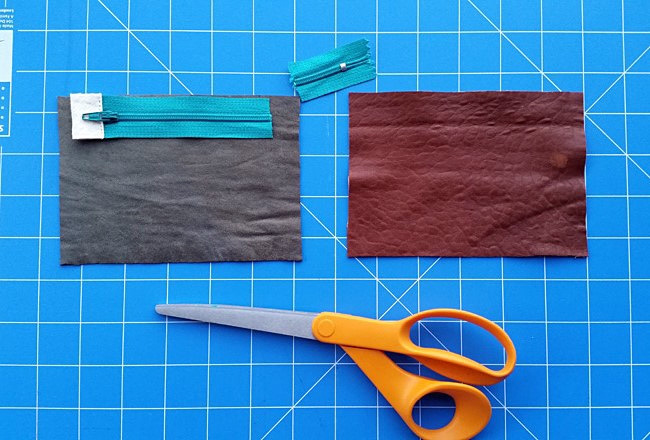 Then attach the fabric tab to the other end of the zip. Follow the same process as before.
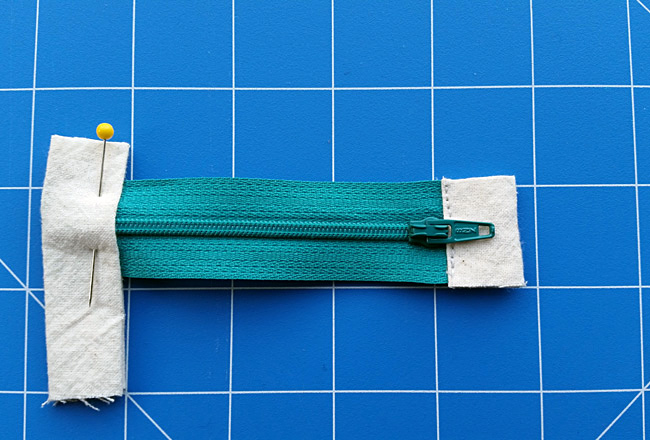

Step 7 | Attach zip to leather pieces
Place the zip face down on right side of one of the leather pieces like so…..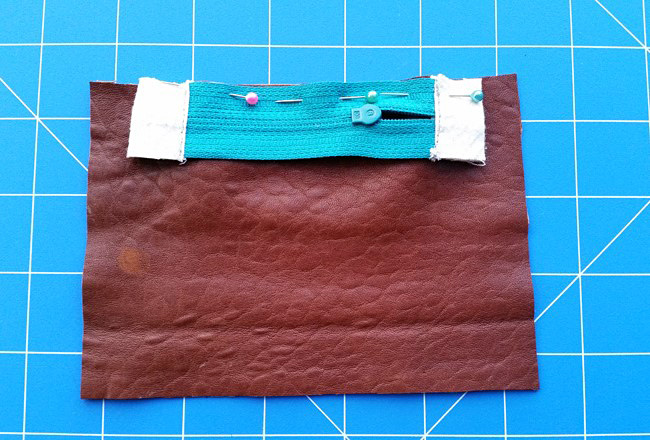 Using a zipper foot and a leather or denim neddle, sew along the length of the zip.
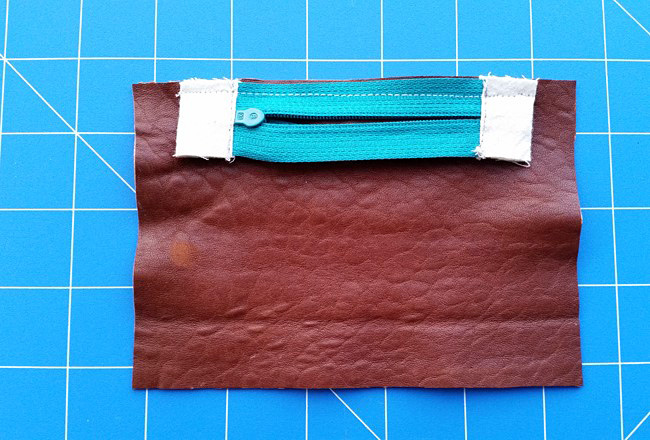 Now attach the other side of the zip. Place upside down zip onto the right side of the remaining piece of leather and sew as before.
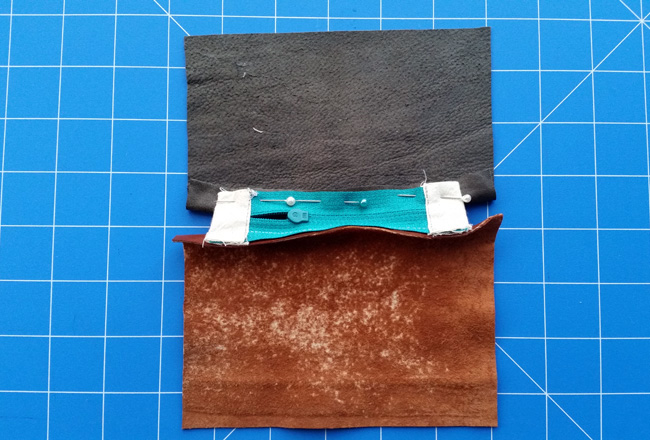
Step 8 | Sew sides & bottom of purse
The final step is to sew up the purse. Pin the sides of the purse together and sew close to but not over the fabric tabs. (p.s. sorry for bad light in these two photos)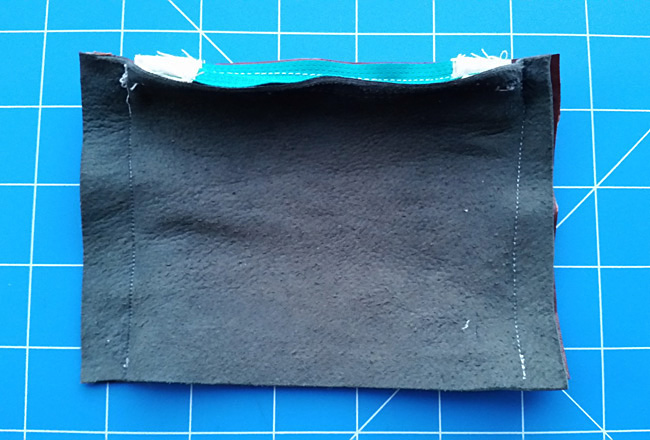 Sew both sides first then the bottom.Now trim the corners and turn the purse in the correct way. Making sure you push the corners out properly, they may need a little coxing and then your all done.
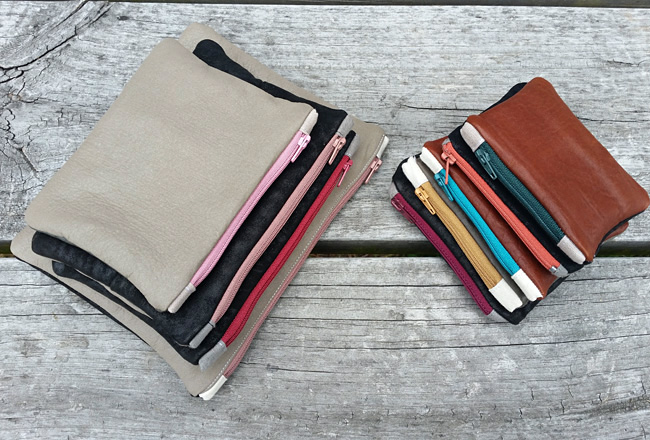
 He strikes again!!! He’s never far away…..always popping up in the middle of a photo shoot!!

14 Comments
I’m loving the bright zippers contrasting with the neutral leather! I’ve got a post on Craft Gossip scheduled for tomorrow afternoon that features your tutorial: http://sewing.craftgossip.com/?p=85385 –Anne
Thanks for the kind words Anne and thanks so much for the sharing!! I can’t wait to check it out. Alana
[…] DIY PROJECT | Two Tone Leather Purse With Zip Tabs, by Threadbare Cloak […]
[…] Get the Tutorial […]
[…] See it HERE! […]
[…] style of pouch is a different take on the two purses I have done before here and here. Being flat, this pouch is the perfect shape for a pencil case, make up bag or wallet. I […]
[…] Tutorial via threadbarecloak.com […]
Oh how I love these two tone leather purse. This tutorial you made is super great. I have never been able to figure out how to put the zippers in. You have explained this brilliantly.Now I can make these beautiful purses. My grown daughter hates to use a full pocketbook so she just carries clutches. I know she will love this, it is so colorful. I will have to make granddaughter one also so she does not take moms. My 7 year old granddaughter is crazy about purses. I do not have any leather items so can I use leather fabric? Thanks for tutorial.
Thanks Marian, appreciate you taking the time to comment. I’m glad the zip part was helpful and you can totally use a leather fabric or any other strong fabric. Hope your daughter and granddaughter enjoy them. I have another purse/clutch tutorial you may like here
unzip the zipper before you sew the bottom together or you can’t
turn it right side out
Yes definitely a must!! 🙂
Love this project!
You share the information is really awesome. Leather purses are good quality and strong leather. Leather purses is longtime use. You share the tutorial is very helpful. I am glad to find it. I would like to visit the post once more its valuable content. Thanks for sharing the great information. Good Luck!
Great information. I like this.