
With Christmas just around the corner, I’ve been thinking of what I’m going to do for my tree this year. I know it’s quite early to be talking Christmas trees but since the last few years I’ve been making mine I thought I better get started otherwise it won’t be ready in time. I love a non-traditional tree, something a bit quirky and fun. This year I have decided on a rustic driftwood Christmas tree. It was ridiculously easy to make and cost next to nothing, which is a price tag that wins me over every time. So keep reading for all the step by step details on how to make one for yourself.
What you’ll need:
- 40 pieces of driftwood + a few extras
- 2 metre length of reinforcing rod
- 20cm wide slice of log
- Drill
- 1 small nail

Step 1| Collect driftwood
This is definitely the fun part, because you get to go to the beach to collect the driftwood! Hopefully its a beautiful day so you get to have some fun in the sun while your there. When it comes to choosing the pieces of driftwood, pick pieces that are as straight as possible and make sure no two pieces are the same length. Chose the widest piece of driftwood first, mine was 1.15metre, this will form the bottom “branch”. Then collect successively shorter and shorter pieces until you get to the shortest piece, mine was 15cm, which will then be the top “branch”. I laid mine out on the beach so I could eye up how it was going to look and to make sure I had the right amount of driftwood and they were the correct lengths. Grab a few extra pieces just in case some break during the drilling process, especially the smaller sizes.
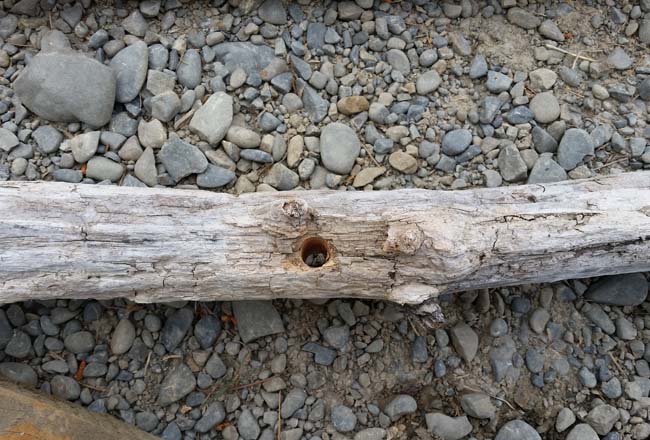
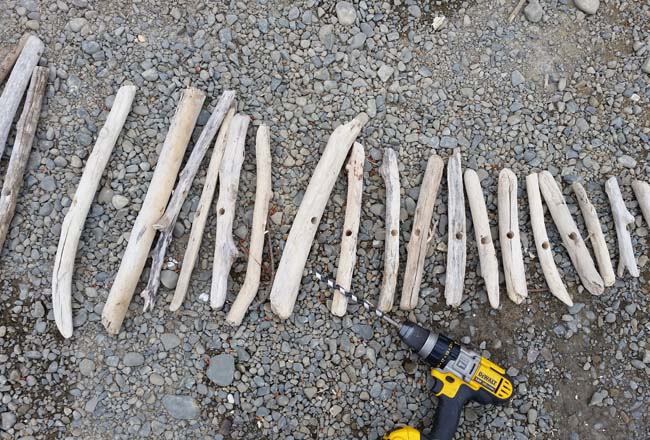
Step 2| Drilling holes in the driftwood
Once I dragged all my driftwood home I then moved onto drilling the holes in the centre of each piece. Use a drill-bit the same size or slightly larger as the reinforcing rod, this way they will easy slide down the rod when it comes to assembling the tree. I broke a few pieces while doing this step, especially the smaller ones, so this is where the “few extra pieces” come in handy.
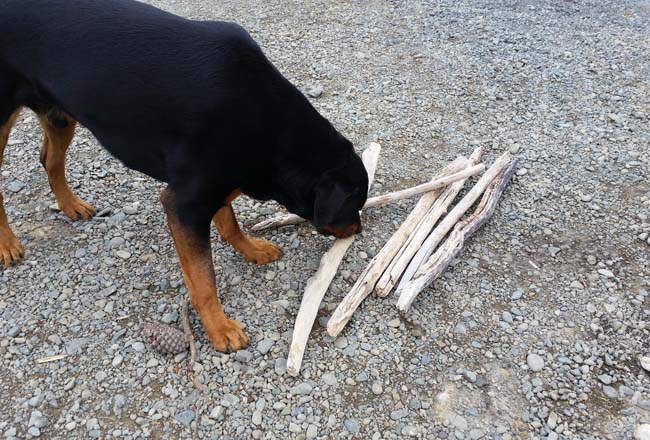
Step 3| Beware of driftwood stealing dogs!

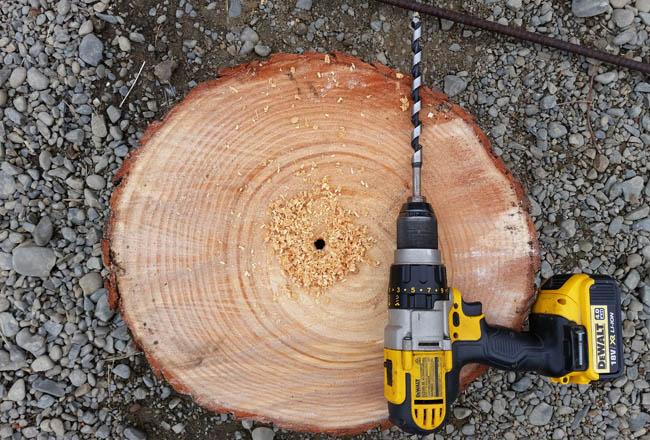
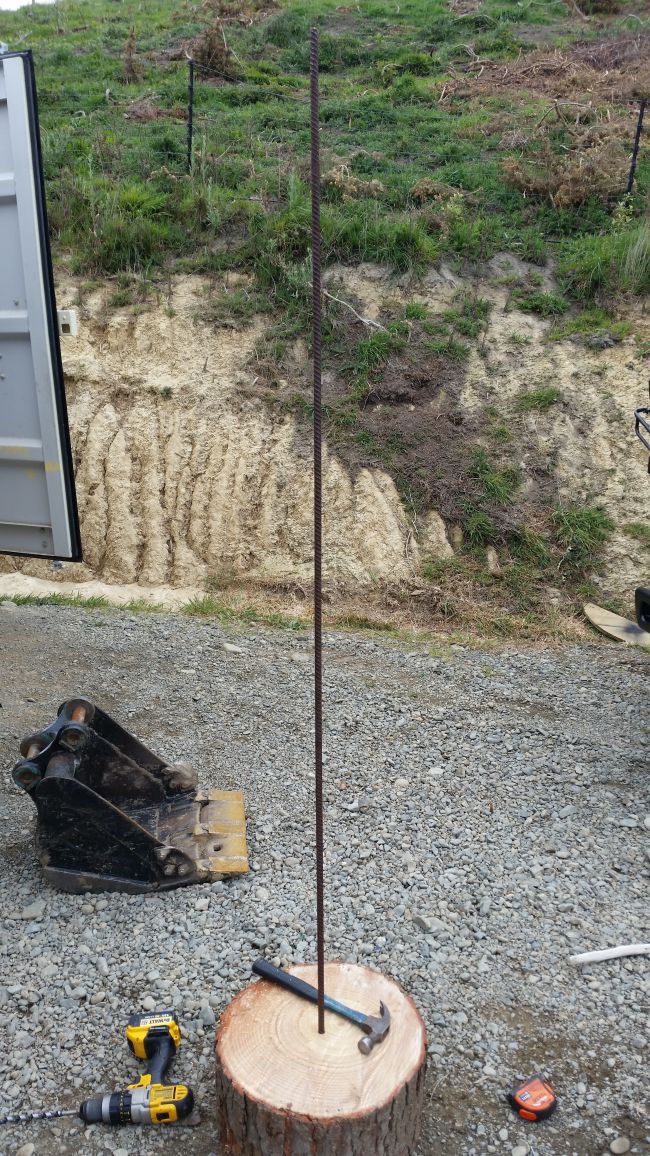
Step 4| Drill hole in the log
Drill a hole in the centre of the slice of log 3/4 of the way through, using a drill-bit slightly smaller than the reinforcing rod. Slide the reinforcing rod into the hole. You may need to use a hammer to gently tap it in. Make sure it fits snuggly.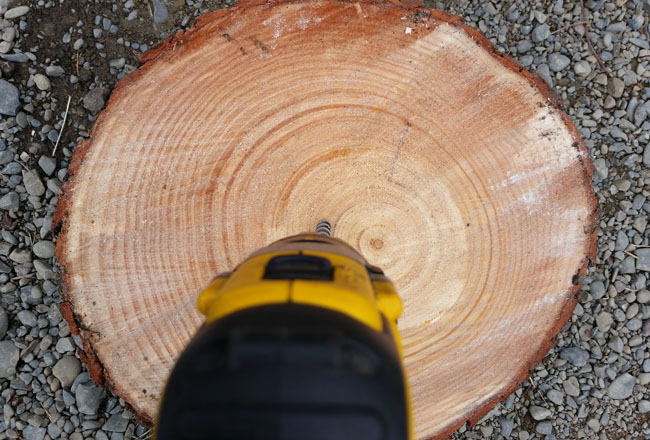
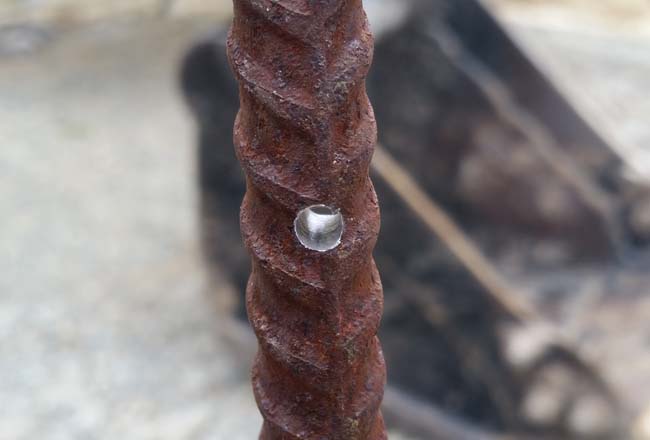
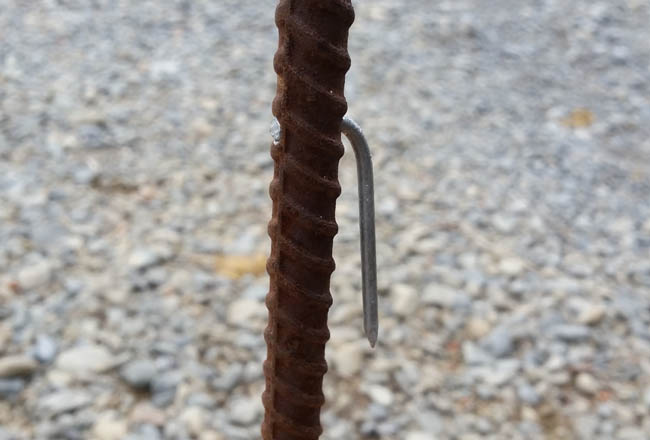
Step 5| Drill hole in reinforcing rod
Measure 30cm up the reinforcing rod from the base and drill a small hole through the rod. Place the nail through the hole and use a hammer to bend the nail so it is parallel with the reinforcing rod. This will hold the driftwood up and create space for the “trunk”. It will not be seen as long as the nail is small enough. 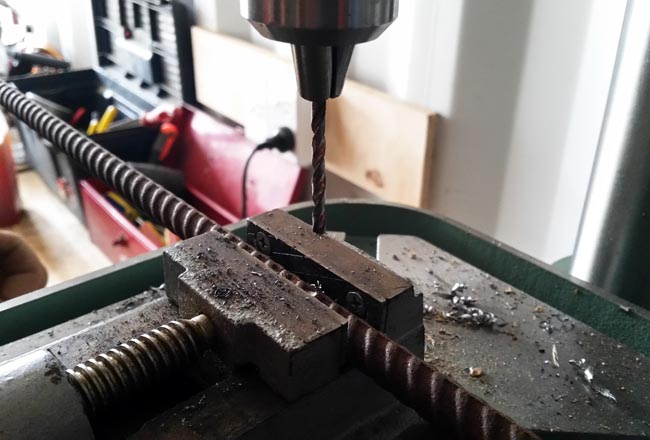
Step 6| Assemble the tree
Now the fun part! Slide the driftwood pieces down the reinforcing rod starting from the longest to the shortest. Arrange the driftwood branches so they are pointing in various directions to resemble a real tree and your done!


10 Comments
What a great idea! looks so chic and minimal! absolutely adore it 🙂 very Scandinavianish 🙂 xx
Thanks so much Hedda. xx
I will definitely give this a try!
Awesome Linda! Let me know how you go, I’d love to see
This is such a pretty DIY! Love it!! Thanks for submitting it to DIY Crush! I just now published it. Sorry for the delay! 😉
Thanks for sharing Denise, it’s never too late!
I love that driftwood Christmas tree!! And your dog is so cute!! Haha maybe he wants to help too.
I would love if you share this with us at the party we host each Tuesday at http://sweethings.net/two-uses-tuesday-57/
Hugs,
Pili
Good doggie!
He is….although a little sneaky!
[…] tree for something a little more unique? Well this project is for you. Alana, from the DIY blog Threadbare Cloak, gives us the low down on how to make our very own driftwood Christmas tree. It looks stunning […]