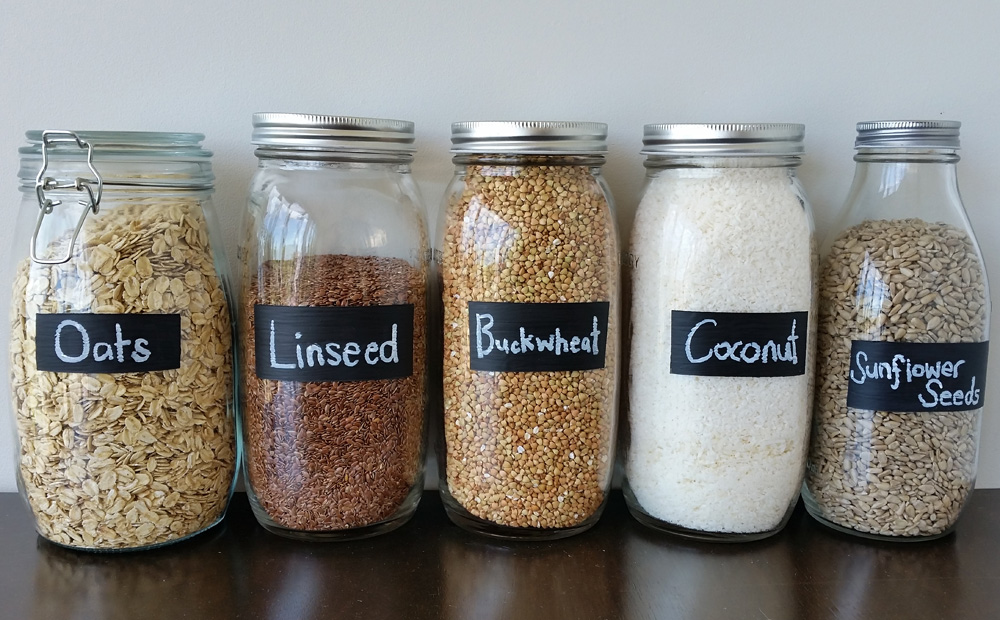
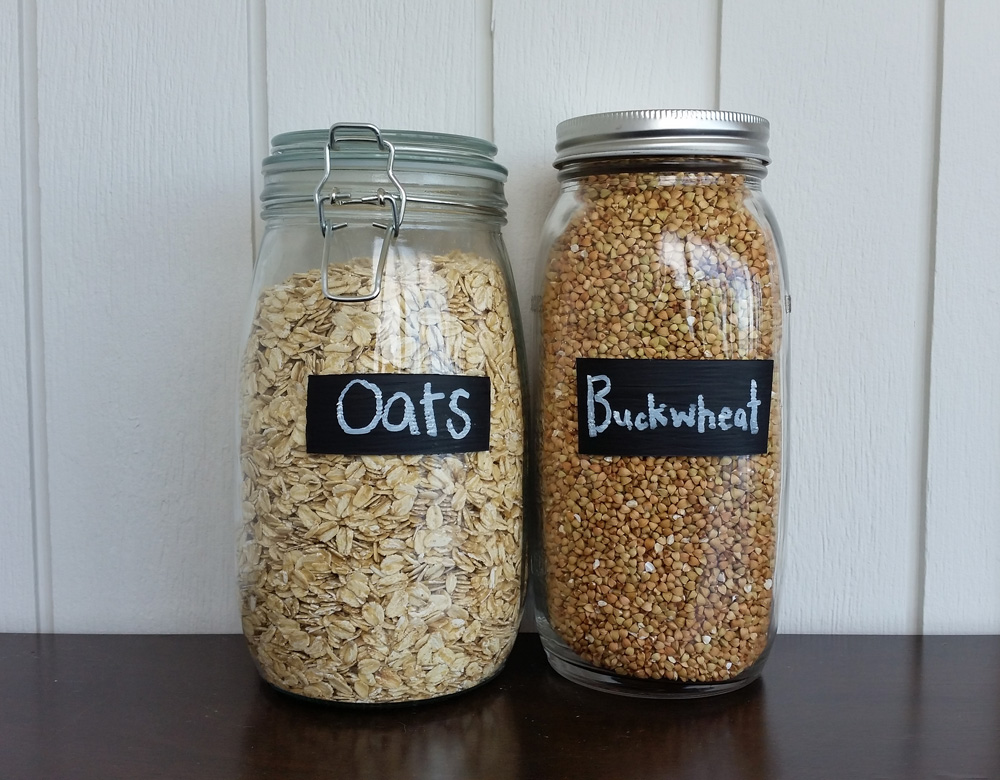
I think these painted chalk labels are a cool way of organizing all those glass jars in the kitchen and are so quick and easy to do, it’s ridiculous! They make a huge difference in kitchen organization, especially if your someone like me that has no labels on any of my glass jars! The old game of guessing which flour is in which jar no longer needs to be played at my house since I painted chalk labels on all mine! No more baking mishaps thank goodness!!
They would also make a great gift idea, especially with Christmas just around the corner. You could even team them up with some of my other DIY kitchen gift ideas; Hand Painted Tea Towels and Decorated Wooden Spoons or any other kitchenware DIY’s you can think of, to make the ultimate pressie combo.
Here’s how I did it
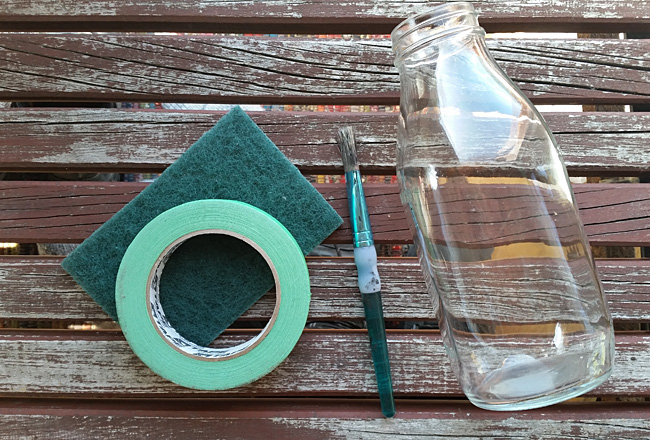
What you’ll need:
- Glass jars
- Black Chalk Paint
- Paint brush
- Painters tape
- Scourer
Step 1| Clean jars
First things first, you need a bunch of jars. Second hand stores are a great place to find cheap ones, but new ones are perfect too. Give the jars a good clean and dry.
Step 2 | Painters tape
Place 4 strips of painters tape on the glass jar to form a rectangle. Inside the tape is where the chalk paint will go, so the tape works as a guide to get straight lines and as a barrier to prevent the paint going anywhere else.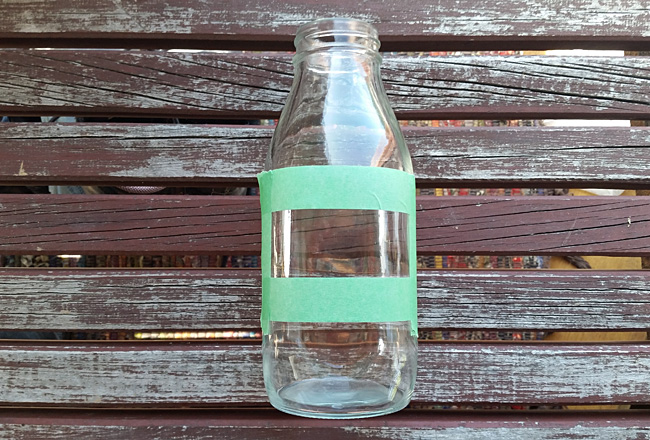
Step 3 | Pot scourer
Using the pot scourer, rub over the glass rectangle. This works to scratch up the surface of the glass a little so the in paint will adhere better. That’s the theory anyway.
Step 4 | Paint
Give the chalk paint a good shake before opening and then a good stir. Paint the chalk paint in the rectangle. Let it dry, then apply another coat, repeat coats until there is good paint coverage. Then leave to dry for the final time.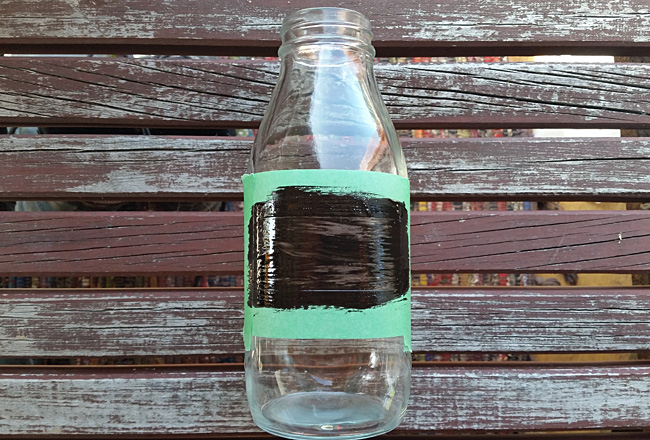
Step 5 | Remove tape
Once completely dry, carefully remove the painters tape one strip at a time. This is an easy job if you’ve used painters tape, which doesn’t leave residue. 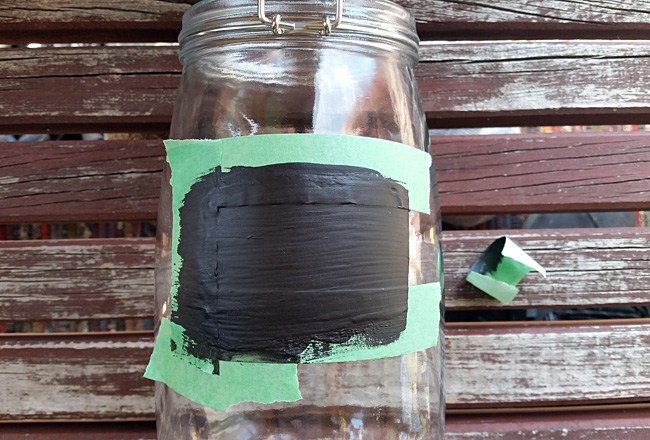
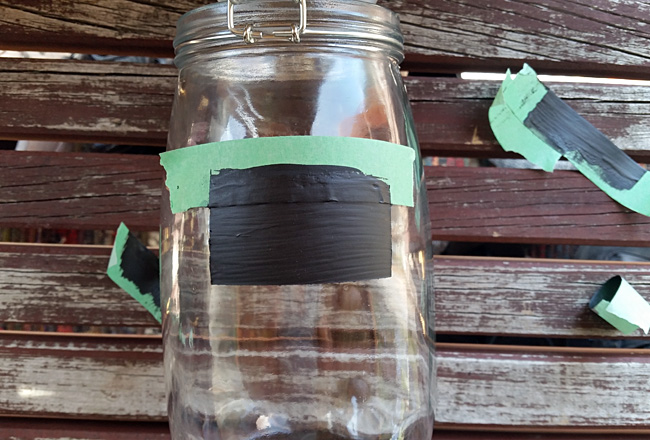
Step 6 | Tidy edges
You may need to use a skewer or something similar to scratch off any paint over run if any. Then the final step is to get the chalk pen out and start labeling and then your all done!!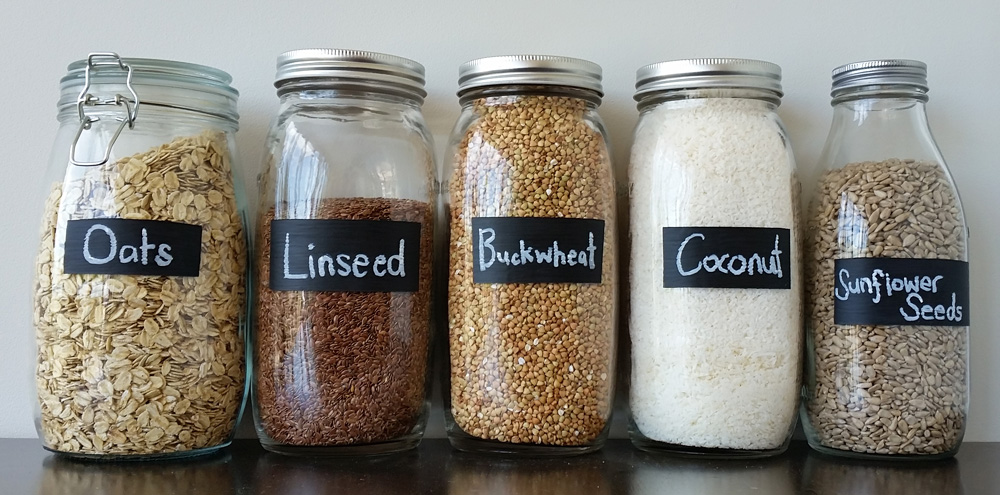

3 Comments
[…] See it HERE! […]
Thanks for sharing Inspiration DIY xx
[…] If your still stuck for a Mothers Day DIY gift after all these ideas then check out a few of my diy gifts; Leather Purse, Plant Pots From Ceramics and Painted Chalk Labels on Glass Storage Jars. […]